
Chile Chicken
8:08 AM
This is an all-time favorite of everybody who I have ever cooked it for. It's the first thing I cooked out of my first cookbook gifted to me by my older sister my senior year of high school. Now, it's the thing that everybody wants whenever I offer to cook. It's what I cooked for Clark's family the first time I cooked for them, and though Clark's younger brother protested that he didn't like chicken dishes, he went back for seconds. It's what I made for Clark when we were first married all on our own, and since then any time I let him request dinner, Chile Chicken it's what he wants. So, that pretty much lets you know just why he wanted it for his birthday dinner.
Though Chile Chicken is extraordinarily easy, there are some unique cooking supplies needed if you aren't usually making Asian dishes. Also, make sure to start the rice (if you're serving it with rice, as I always do) at least twenty minutes before you start cooking the chicken and vegetables. The preparation of cutting up the peppers and chicken is what takes time, so start the rice minutes before you start chopping!
Supplies:
- 1 lb of Chicken breasts cut into "cubes"
- 3 Tbsp Vegetable Oil
- 3 Cloves of Garlic
- 1/2 tsp Ginger
- 1 Egg White
- 2 Tbsp corn starch
- 1 Red Bell Pepper (I don't use the red pepper when I cook it for Clark, as you will see, but for everyone else I do. He's just not a huge fan of red pepper.)
- 1 Yellow Bell Pepper, chopped
- 1 Green Pepper, chopped
- 2 to 3 Chile Peppers, chopped (these are the small red ones, but just about any peppers will do. Last night I used three Serrano peppers which made it spicier)
- 2 Tbsp of Soy Sauce (though I probably end up using around three or four)
- 1 Tbsp of Cooking Sherry (though I always use about 2)
- 2 Tbsp Asian Rice Vinegar (or you can use Red Wine Vinegar, but my husband says the Rice Vinegar makes it taste more authentic)
Directions:
- Cut up the chicken into cubes (as directed) and place them into a medium sized bowl. Add the egg white, corn starch, and 1 tbsp of the vegetable oil. Mix well until all of the chicken is as evenly coated as possible.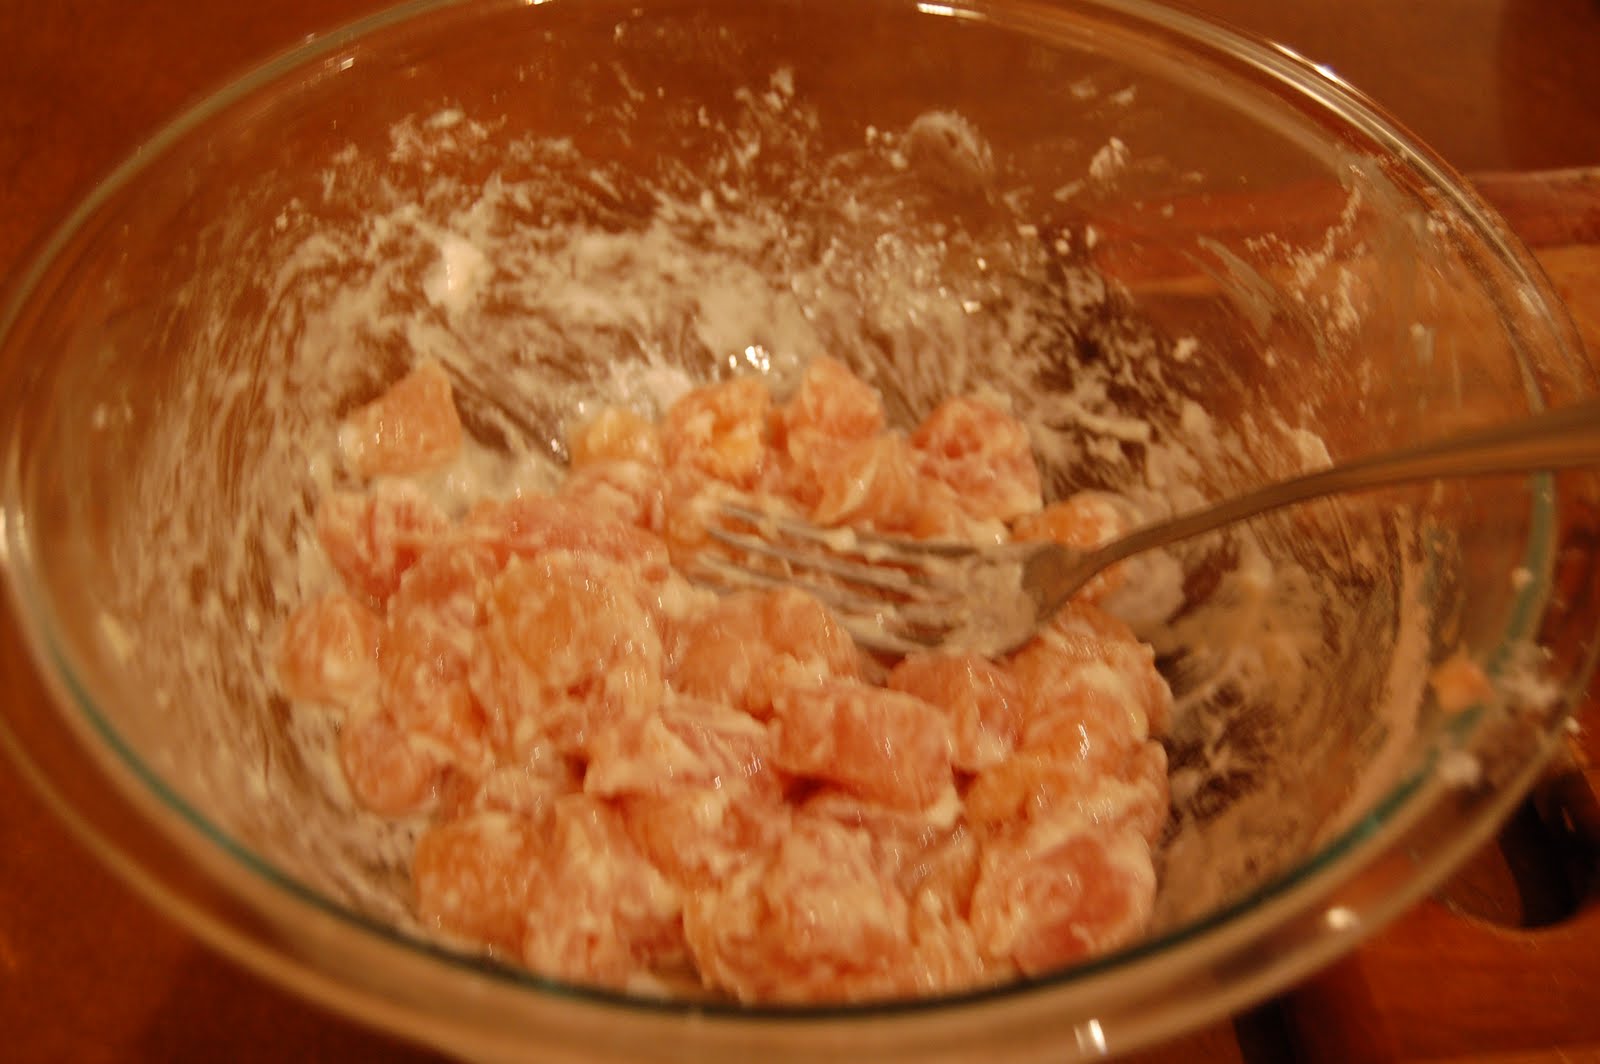
*At this point, make sure that your peppers are already chopped up and you've started your rice. If neither of these things have been done, do this before moving onto the next step.
- Heat the rest of the vegetable oil in a Wok over Low to Medium heat. (If you don't have a Wok, you can use a large frying pan. I did this the first few times I made it and it worked just fine. However, if you can settle for a cheap Wok, you can find them at a Target or Walmart for around $20 to $30.) Mince the garlic into the oil and add the ginger. Cook the garlic until it is browned.
- Add the chicken to the wok. Stir fry this until the chicken is browned or cooked all the way through. It really only "browns" as the cookbook says if you use extra cornstarch. If you want this effect, make sure to use extra cornstarch in the beginning!
- Once the chicken is "browned" (or cooked), add the peppers, soy sauce, rice vinegar, and cooking sherry. Stir fry all of this for a good 2 to 3 minutes. Then. turn your oven down to low (it should have been between Low and Medium previously), cover, and let sit for about five minutes, checking on it every minute or so to stir it.
- You can easily keep the chicken on Low or Warm (if you have that option) if your rice is running a little bit behind. I really don't ever serve anything with Chile Chicken other than rice, but I imagine roles and a salad of some kind would go wonderfully!
- Once your rice is done, serve it in bowls or on a plate, depending on if you have other sides, and enjoy this fabulous dish! Be prepared: if your family and friends like Asian cuisine, they'll constantly be asking for Chile Chicken! 


![EVERYTHING DELICIOUS [Chocolate Chip, Reese's Pieces, Caramel Bits] COOKIES](https://blogger.googleusercontent.com/img/b/R29vZ2xl/AVvXsEhN0JN5gXpCIeguPeoYvhSWYPziFbh_XIGlMhjxXZ_kM7u8HWDETKsq34xmbjbsG6R35JI_yB9yIHGsh3Qmk-KfDeQyQVVzQ4coOBEB2DuxR5GDOejMhK2aRdNq6tnHYcU8Kb4SxVy_EXQ/s72-c/cookies+1.JPG)
![Vegan [Banana PB] Fudge Brownies](https://blogger.googleusercontent.com/img/b/R29vZ2xl/AVvXsEj2EJfIWTEg0KAG4EqxVqulk3-POvu0aYJy95E6AAi257jqznFs6PzHmiLuR7N11XH88cfZbUjvJI_lZjAfW3jbRI3cahcqbHINC3HfVaMfxhiHFRo3Czk-FBwxy6tCAKtWeSMDBs9pidw/s72-c/DSC_0849.JPG)


0 comments